Portrait Mode is a great feature of the iPhone 7 Plus, iPhone 8 Plus, and iPhone X that gives your photos a professional “bokeh” effect, blurring the background much like a DSLR camera does.
While Portrait Mode works great, occasionally the effect doesn’t turn out exactly the way you want. Luckily, you can turn off and adjust Portrait Mode even on a photo you’ve already saved to your Camera Roll.
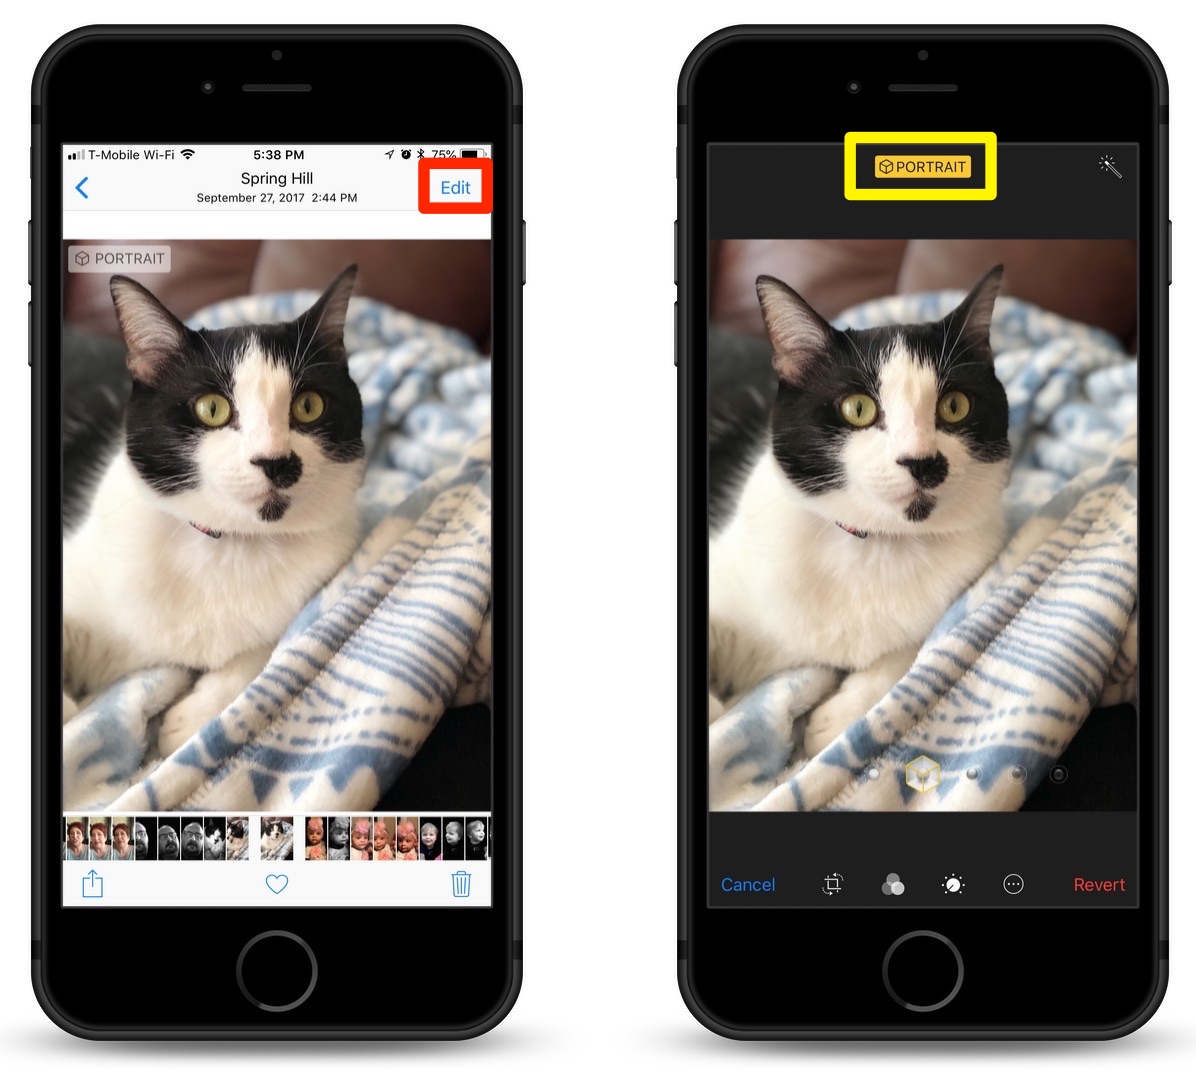
1.) Open the Photos app, and find the Portrait Mode photo you want to either turn into a regular photo, or adjust the Portrait Mode.
2.) While viewing the photo, tap the “Edit” link in the upper-right hand corner.
3.) At the top of the display, you’ll see “PORTRAIT” – Tap that to turn off Portrait Mode for the photo.
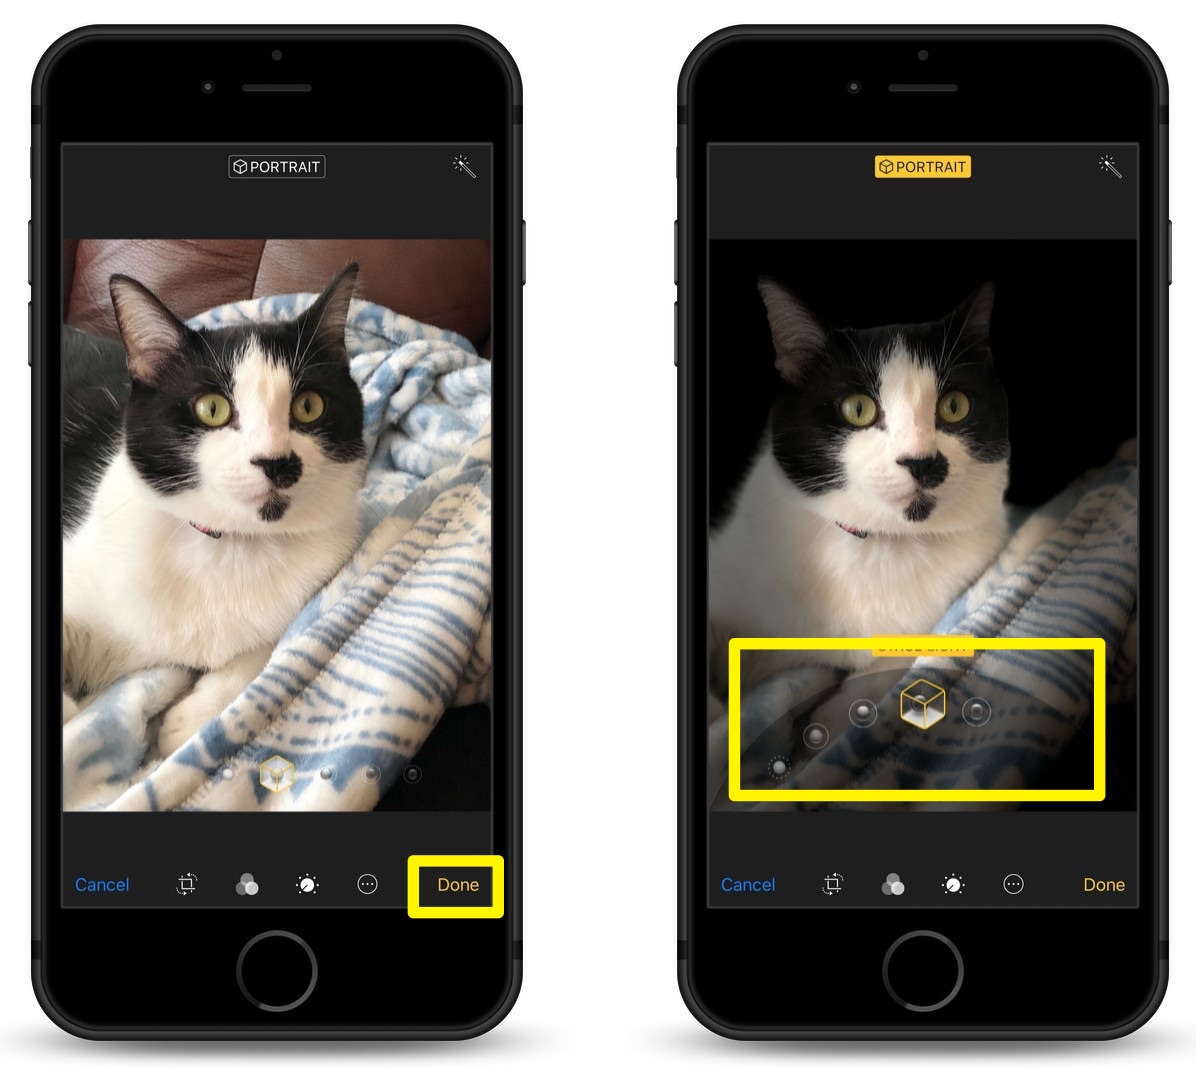
4.) To save the photo without the portrait effect, tap “Done” down in the lower-right hand corner.
You can also adjust the Portrait Mode effect by swiping through the Lighting effects. Effects include:
With just a few taps and swipes of your finger, it’s easy to adjust Portrait Mode lighting or even turn off the effect on Portrait Mode photos you’ve already taken.
For more tips and tricks on how to make better use of your Mac, iPhone, iPad, iPod touch, Apple Watch, or Apple TV, be sure to visit the “How To” section of our website.