

Apple has already begun the process of bringing Retina graphics to their non-Retina Macs – but for many users (or developers testing Retina apps), the process isn’t happening nearly fast enough! There is a way to get a taste of what Retina graphics would look like on your Mac ahead of time, however – and Apple has provided instructions for exactly how to enable Retina graphics on your non-Retina Mac!

Before you can enable HiDPI (‘Retina’) mode, you must download and install Xcode from the Mac App Store. Once you have Xcode, you’ll need to install Quartz Debug. To download Quartz Debug
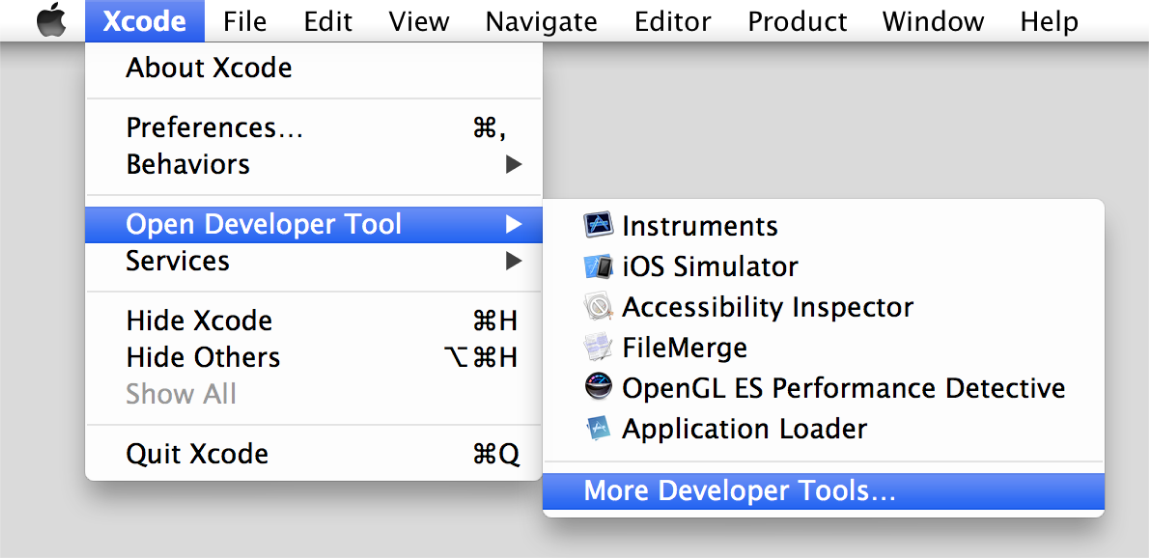
- Open Xcode.
- Choose Xcode > Open Developer Tool > More Developer Tools.. Choosing this item will take you to developer.apple.com.
- Sign in to developer.apple.com. You should then see the Downloads for Apple Developers webpage.
- Download the Graphics Tools for Xcode package, which contains Quartz Debug.
Once you have successfully installed Quartz Debug, you’re ready to enable HiDPI modes on your Mac. Here’s how it’s done:
To enable high-resolution display modes
- Launch Quartz Debug.
- Choose UI Resolution from the Window menu.
- Select “Enable HiDPI display modes”.
- Log out and then log in to have the change take effect. This updates the Resolutions list in System Preferences.
- Open System Preferences > Displays, and choose a resolution that is marked as HiDPI.
Now that you’ve completed all of the steps, you’re ready to start checking out Retina graphics on your non-Retina Mac! Enjoy!
For more helpful tips, check out our full collection of tutorials by visiting our How-To category!
