

If you’ve ever lost data on your Mac (and who hasn’t?) you’ll know it is a stomach-wrenching experience. This is especially true if the data you lost was related to an important work or school assignment. While many times the lost data was due to your mistakenly deleting a file or formatting a drive that still had needed data on it, there are also other hazards that can cause a lost file, such as a crashed drive or a misbehaving application.
Luckily, there is a handy utility available to help you restore those lost files. In this article, I’ll be reviewing the latest version of Stellar Data Recovery Professional for macOS (version 11.8.0.0).
For those of you who feel this article falls under the heading of TL;DR, I’ll say that the utility did an excellent job of recovering lost files, both on my Mac’s internal SSD drive and my external SSD drive. I’ll also admit that the app isn’t cheap. However, there is also a free version of the app available, and if you only need to recover a small amount of data (under 1GB), the free version may meet your needs.
Installation
Stellar Data Recovery for Mac was quite simple to install. The application is installed using the standard macOS process, which is to download a disk image, open the image, drag and drop the application icon into your Mac’s Applications folder, and wait for the installation process to complete.
Once the installation process is complete, open the Applications folder, find the Stellar Data Recovery icon, double-click it, enter your product key if you purchased one, and you’re ready to start recovering data.
Using The App
In the early days of computing, data recovery apps required the use of complicated commands or confusing menus to restore your data. Luckily, Stellar Data Recovery’s user interface is straightforward and easy to use.
The opening screen presents you with several toggle switches, which control the type of files the app will recover. Your choices are:
- Documents
- Emails
- Videos
- Audio
- Photos
- Recover Everything
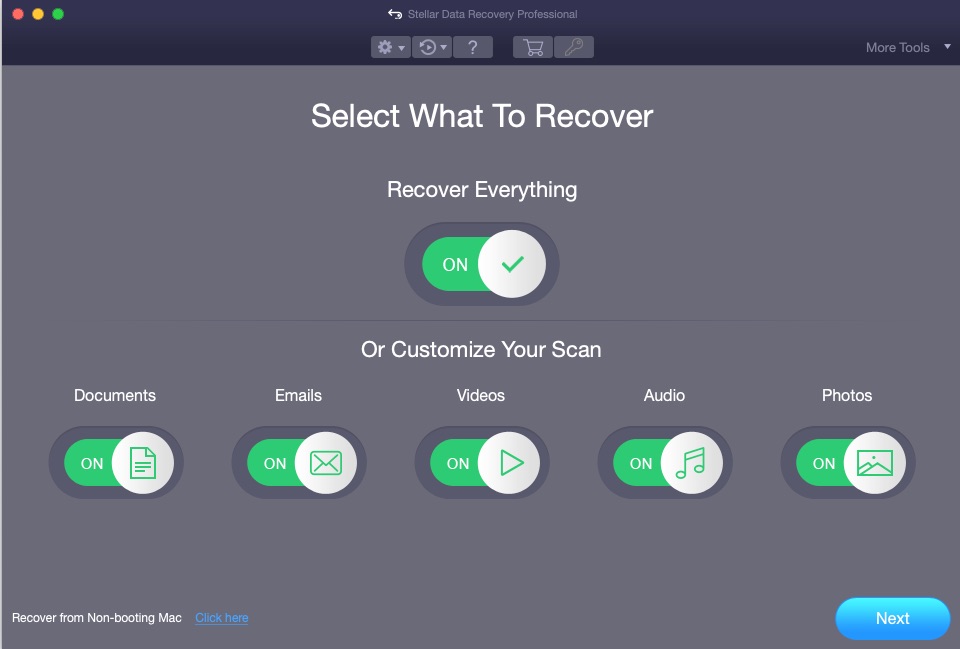
The first five toggle switches allow you to designate what type of files you wish to recover. They can be turned off or on in any combination. The “Recover Everything” toggle switch enables or disables all of the other file type switches with a single click.
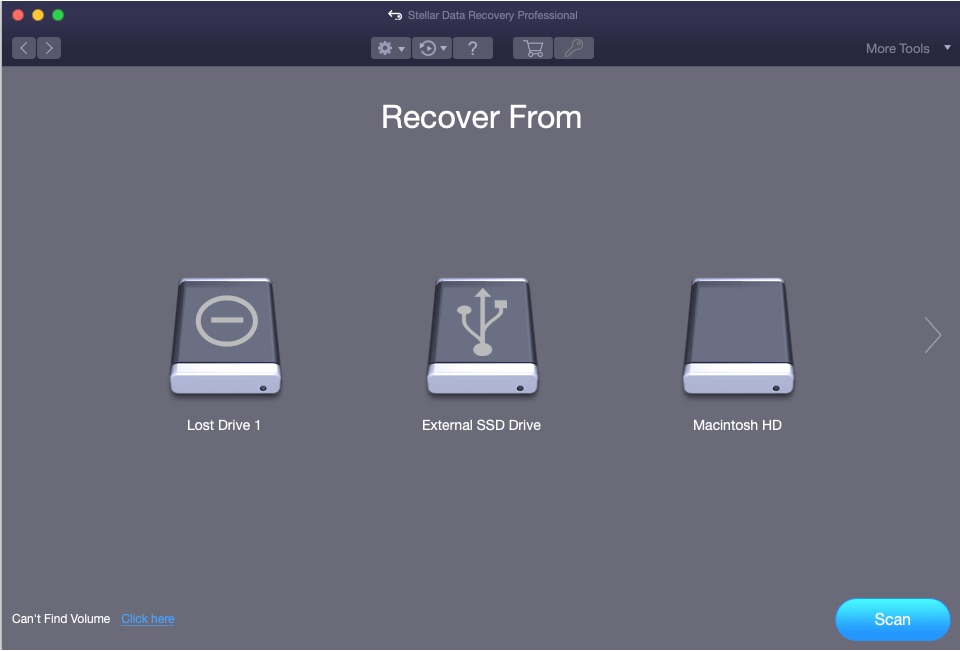
Once you’ve made your decision, you’ll click the “Next” button, which takes you to a screen where you are prompted to select the drive you wish to recover the files from. You’ll see your Mac’s internal hard drive listed, as well as any external drives you have connected to your computer. Here, you’ll click on the drive that you wish to restore files from, then click the “Scan” button to begin.
The Scan screen will then appear, where you’ll see a progress indicator showing how much of the drive has been scanned. You can also toggle on or off the preview functionality, which shows a thumbnail preview of the current file being scanned.
Please note, while Stellar Data Recovery can recover files from encrypted drives, you will need to know the encryption password.
As you can see, the app is easy to use and shouldn’t be confusing, even to a novice user.
A scan of my Mac mini M1 machine’s 256GB internal SSD drive took just under eight minutes. As you might expect, scanning my external 2TB SSD drive took longer. Your mileage will vary, depending on the size and type of drive you’re scanning. (Mechanical hard drives will take longer to scan than an SSD drive.)
I would have liked to see an option to narrow down the scan to just the folder name or file name you’d like to recover in the case of needing to recover a single file or folder, which would logically result in a shorter list, but it is relatively easy to scan through the results to find what you need.
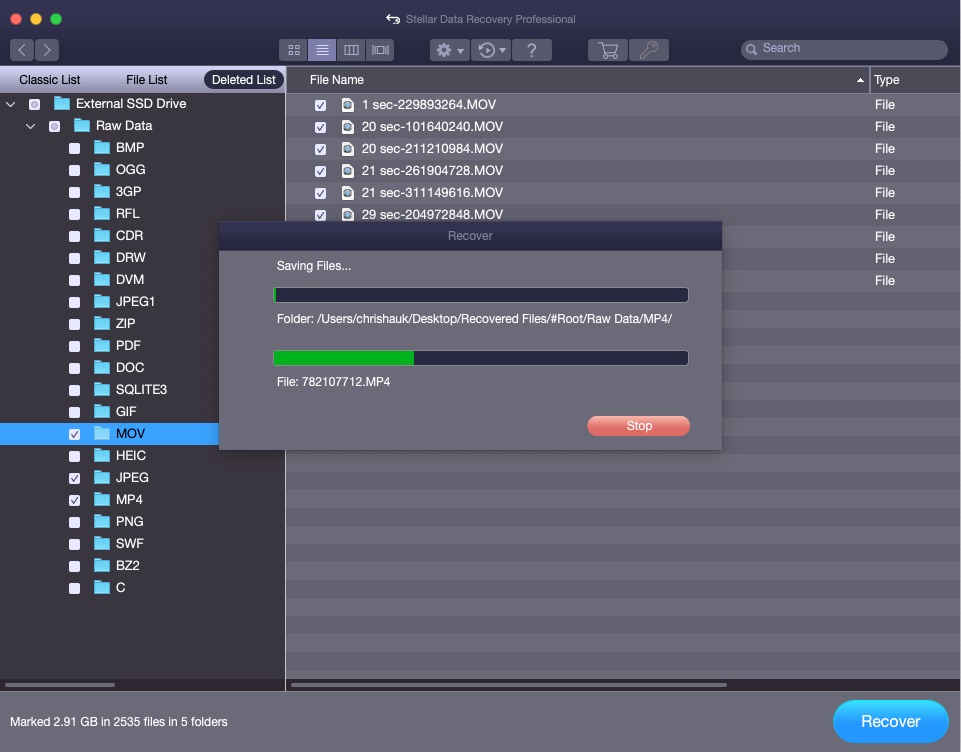
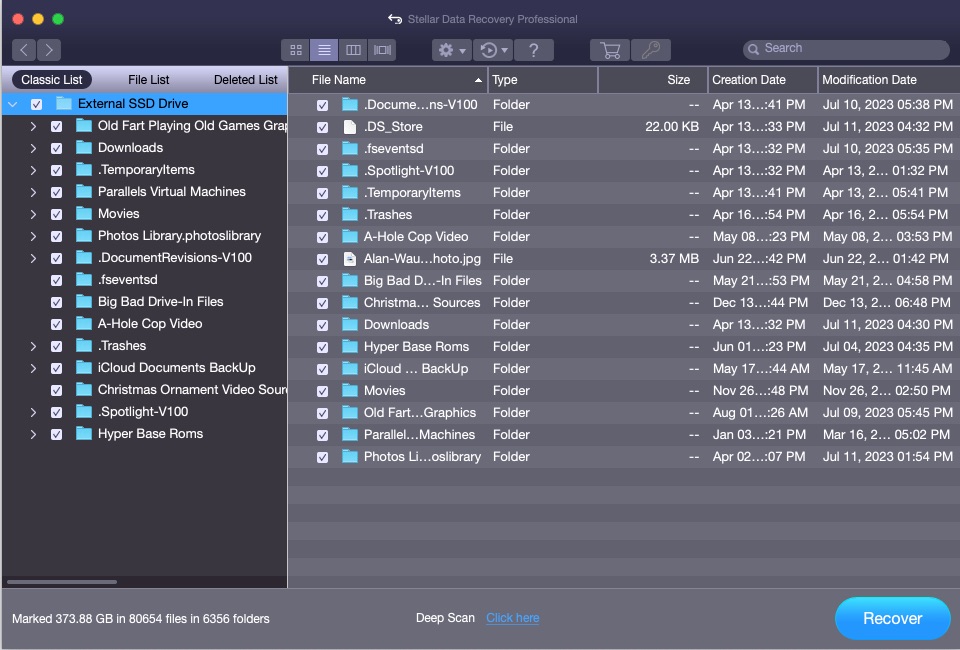
Once the scan completes, you’ll see a list of the files and folders on the left-hand side of the application window. I found that by clicking “File List” at the top of the list, I saw a list of files that mirrored the folder structure on my Mac’s internal SSD drive.
You can also customize many settings of the view you’ll see after scanning, as clicking on the Settings icon (It’s a gear with a downward arrow) you can bring up the View settings, which allows you to configure how the files are previewed and can also set the minimum partition size for displaying in Stellar.
You can also control which file types are to be displayed, while also having the ability to add file types to Stellar’s list of default file types.
The Recovery Results
I tested Stellar’s file recovery capabilities by creating, storing, and then deleting various file types (*.mov, *.mp4, *.jpeg, and *.txt) on my Mac’s internal SSD drive, as well as my external SSD drive.
Using the standard scanning mode, I scanned for “Everything” from the main menu. In just a few minutes for both drives, Stellar was able to recover the deleted files. It also found deleted files from several months back, which I have to admit impressed me quite a bit.
I used Deep Scan mode on my external SSD drive, which I have to admit had to run overnight, but it was able to find a few more older files here and there but I probably wouldn’t use deep scan unless I was unsuccessful with the standard scan.
While I was unable to format a drive and attempt to restore files from the formatted drive due to limited drive availability (I am just a poor freelance writer, after all), I have faith in the app’s ability to recover files from formatted drives.
Additional Features
Stellar Data Recovery’s features list depends on which version you opt to purchase. I tested the professional version of the app, which not only recovers deleted files from just about any type of drive, including formatted and encrypted drives, it also recovers files from deleted partitions, recovers files from non-booting Macs (thank Jobs I didn’t have to test that feature), and monitors your Mac’s hard drive health.
The Verdict: 9.2/10
I was quite impressed with Stellar Data Recovery’s capabilities, and I expect to keep it in my arsenal of recovery tools. The app is easy to use, and is quite powerful, recovering deleted files with ease.
I strongly recommend the app for anyone looking to recover previously lost files. At the very least, I suggest trying the free version of the app, which will give you a good idea of the app’s capabilities.
Steve Jobs once said of an Apple product, “it just works.” The verdict for Stellar Data Recovery is just that, “it just works,” and it works quite well.
Pros:
- Easy to use, with a clean and logical user interface
- Free option allows you to test-drive the app
- Fast scanning for lost files
- Allows previewing of files
Cons:
- Deep scans take a l-o-o-o-o-ng time, with somewhat limited benefits
Pricing & Features
At the time of this article, the pricing for Stellar Data Recovery for Mac is as follows:
Professional: $89.99 for a one-year license – Recovers permanently deleted data, data from crashed or non-booting Macs, data from Time Machine drives, and files from BootCamp partitions.
Premium: $99.99 for a one-year license: Includes all of the Professional features, while also offering the repairing of corrupt photos and videos.
Technician: $149 for a one-year license. Includes all of the Premium features, while adding multiple user licenses for installation on multiple systems, the ability to recover data from Windows partitions, and the ability to create disk images.
Lifetime licenses are also available for a bit more. $149 for Professional, $199 for Premium, and $399 for Technician.
Stellar Data Recovery Professional
$89.99
Pros
- Easy to use, with a clean and logical user interface
- Free option allows you to test-drive the app
- Fast scanning for lost files
- Allows previewing of files
Cons
- Deep scans take a long time, with somewhat limited benefits
