


Let those among us that has never accidentally deleted a file or folder or accidentally formatted a hard drive rise and leave the room. Okay, now that the liars have left the room, let’s talk data recovery for the Mac. Specifically, Stellar Data Recovery Technician for Mac.
Stellar Data Recovery Technician for Mac is a popular and easy-to-use data recovery utility that allows you to quickly and efficiently recover files and directories you or a rogue application has deleted. The easy-to-install and easy-to-use app can recovery lost data from drives in several formats, and from network drives, over the network, or from a direct cable connection.
Is Stellar Data Recovery Technician for Mac Compatible With My Mac and My Drives?
Stellar Data Recovery Technician for Mac runs natively on Apple M1 – M5 Apple Silicon Macs, as well as Intel-powered Macs. The app has been fully tested for compatibility with macOS Tahoe 26.
The app can recovery from a variety of storage devices and formats. It:
- Recovers several different file formats, including documents, emails,videos, audio files, and images
- Supports recovery across major storage devices like HDD, SSD, USB’s, SD Cards
- Recovers from Time Machine backups
- Recovers data from Synology, QNAP, and Asustor NAS drives (Online & Offline)
- Recovers Linux drives- EXT2, EXT3, EXT4 (Online & Offline)
- Supports virtual machine files: VMDK, VDI, VHD, and VHDX
Installing Stellar Data Recovery Technician for Mac
Installing Stellar Data Recovery Technician for Mac is easy and takes only a few moments to install. Simply visit the Stellar website and click on the download link you’ll find here. It is 100% free to download and install the app, although you’ll need to pay a licensing fee to gain access to the apps full feature set. (More about that later.)
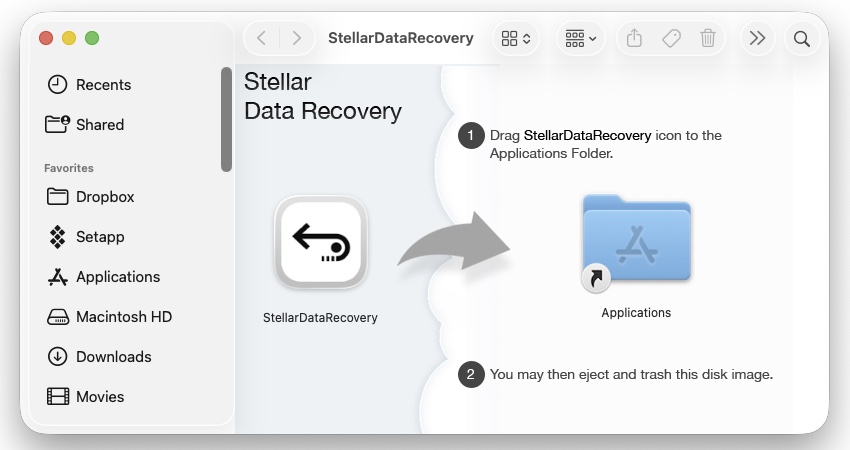
Once you’ve downloaded the Zip file containing the installation files, go to the folder you saved it in and double-click the ZIP file to expand it. Once the file has been expanded, double-click the .DMG file from the zip. This will mount the installation disk. In the folder that opens, click and hold on the “StellarDataRecovery” file, then drag it over to the “Applications” folder. This completes the installation process. You can now close the installation window and eject the StellarDataRecovery disk image from your Mac’s Desktop.
Using Stellar Data Recovery Technician for Mac
Not so many years ago, recovering deleted data required users to memorize complicated commands that were often mistyped, or to navigate through complicated menus before being able to even attempt to restore lost data.
Happily, Stellar Data Recovery Technician’s user interface is straightforward and easy to use, with only a few logical menus to select your task, and to designate the files and folders you’d like to recover.
Once the app loads, the opening screen presents you with the “What to Recover” screen, which allows you to click the boxes to designate the types of files you would like the app to recover.
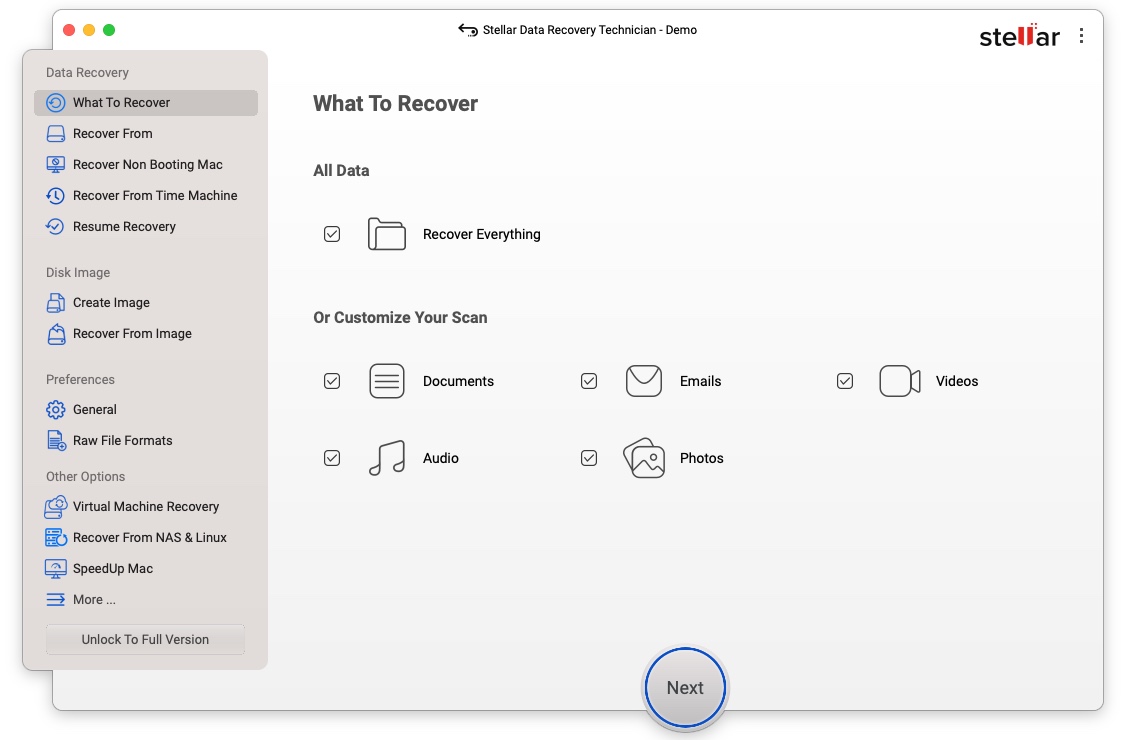
Your choices are:
- Recover Everything (Attempts to recover all of the files listed below)
- Documents
- Emails
- Videos
- Audio
- Photos
- Recover Everything
Once you select what you’d like to recover, the app takes you to the “Recover From” screen. This is where you select each drive you’d like the app to search. These two steps will generally be enough for Stellar Data Recovery Technician to begin searching for your lost files.
Be aware that, unlike Stellar’s other Mac data recovery app, which can only recover from HDDs, SSDs, external drives, USBs, and SD cards, and can recover up to 1GB of files for free, you will have to purchase Stellar Data Recovery Technician to have the ability to recover files. However, at least the free version scans your hard drive for the files, meaning you can determine whether the lost files are available for recovery.
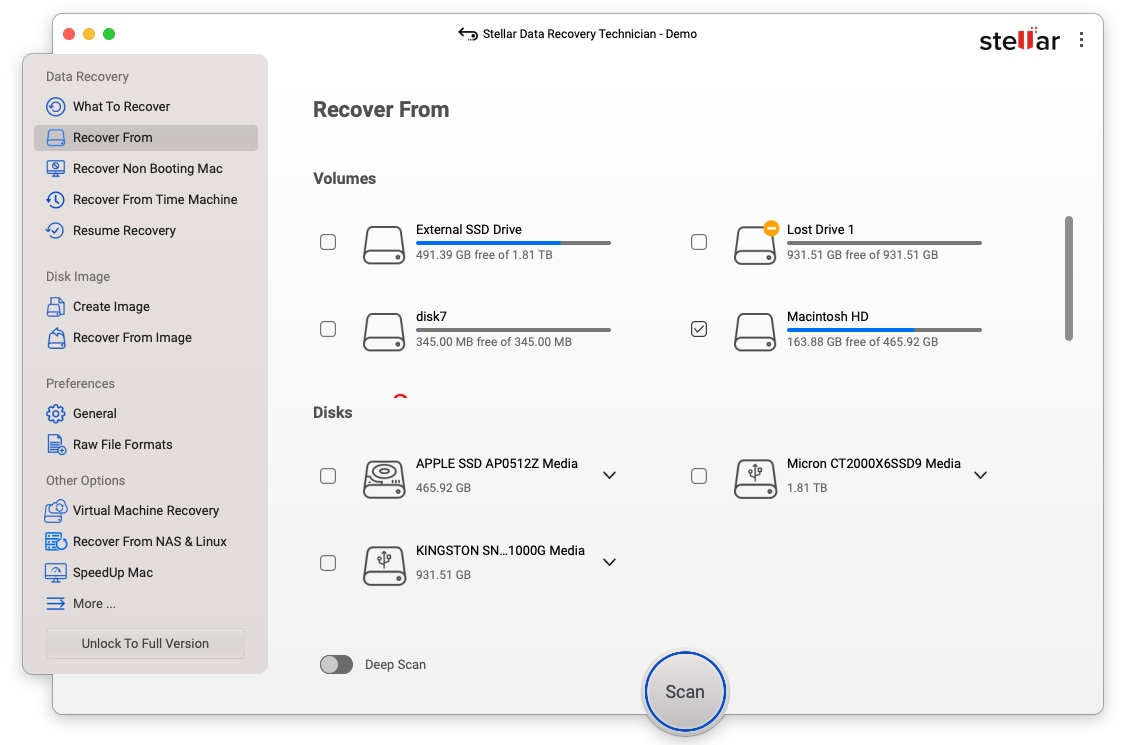
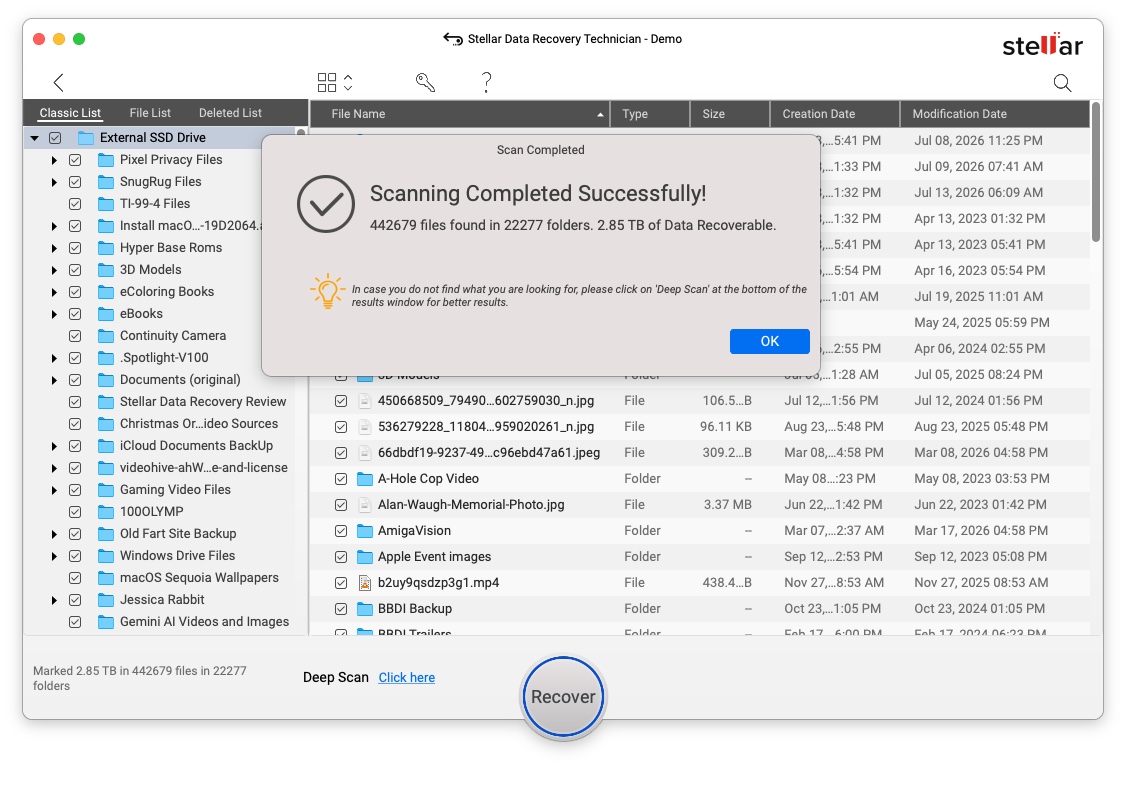
I scanned my M4 Mac mini’s 512GB internal SSD drive, which was about ⅔ full, and a full scan took just a little longer than 30 minutes. As you might expect, scanning my external 2TB SSD drive took longer. Your scanning time will depend on your Mac’s specs, including the size and type of drive you’re scanning. (Mechanical hard drives will take longer to scan than an SSD drive, and networked drives will take longer than a local mechanical hard drive.)
Once you’ve paid for the app, you can not only recover from local and external hard drives and other forms of local storage, you can also recover files from Synology, QNAP, and Asustor NAS drives over a network or over a cable. BTRFS, EXT4, RAID 0/5/6, Time Machine backups, Linux drives, and Apple M5 Macs are also supported.
Simply point the utility at your NAS device’s IP address — be it Synology, QNAP, or Asustor — and it will detect the device on your local network. Supported file systems are BTRFS and EXT4. QNAP Thin Volumes are also compatible, as are QNAP Static EXT4 volumes in standalone, RAID 1, RAID 5, and RAID 6 setups.
If your NAS device itself has failed, you can pull the NAS drives and connect them directly to your Mac via an adapter cable and then perform an offline NAS recovery. The utility can read BTRFS and EXT4 from Synology, QNAP, and Asustor drives across RAID 0, RAID 5, RAID 6, SHR1, and SHR2 configurations.
You can also connect to a Linux drive via an IP address and recover data from EXT2, EXT3, or EXT4 file systems.
While you will need to purchase a license for Stellar Data Recovery Technician to actually recover files, I can assure you that if the app finds the files you need, it can almost certainly recover them. This comes from years of experience using Stellar’s other recovery utilities.
The Verdict: 9/10
I was quite impressed with Stellar Data Recovery Technician’s capabilities.. While easy to use, the app is quite powerful, finding and recovering recovering deleted files with ease. Whether you need to recover files on your local drives or on NAS and other network attached drives, thi app is the one I strongly recommend.
If you are looking to only recover a small amount of data from a local drive, I suggest trying the free version of the standard recovery app, which will give you a good idea of the app’s capabilities, while allowing the recovery of up to 1GB of files.
However, if you need to recover files from NAS drives or other networked storage, I recommend springing for the paid version of Stellar Date Recovery Technician, available here.
Pros:
- Easy to use, logical user interface
- Free scanning for lost files allows you to test-drive the app
- Fast scanning for lost files, be it on local drives or networked drives
- Allows you to determine if lost files can be found
Cons:
- You need to pay for a license to actually recover any data
- Deep scans take a long time, so bring your lunch
Pricing & Features
At the time of this article, the pricing for Stellar Data Recovery for Mac Technician is as follows:
You can purchase a one-year license for $199, or a lifetime license for $399. The price includes all of the features, offered in other version, as well as the recovery for data stored on Windows, Linux, NAS and other networked storage.
Stellar