This Mac tip is provided by Mark Greentree and was originally posted on Mark’s blog – Everyday Mac Support. For more of Mark’s tips visit his site, follow him on Twitter, or browse his archive of posts here.
Users of the Preview application will be glad to know there is now a way to add your signature to documents such as PDF files.
There are multiple ways in which you can add your signature. You can have a pre-existing document that you would like to add a signature to. As such through the annotation options you can select the signature drop down option as shown below and then select “Create Signature from Built-in iSight…”
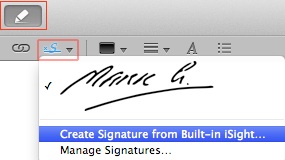
You can also select “Manage Signatures” which will give you a option to add a new signature or you can navigate to the Preview-Preferences and then proceed to the “Signatures” tab as presented below:
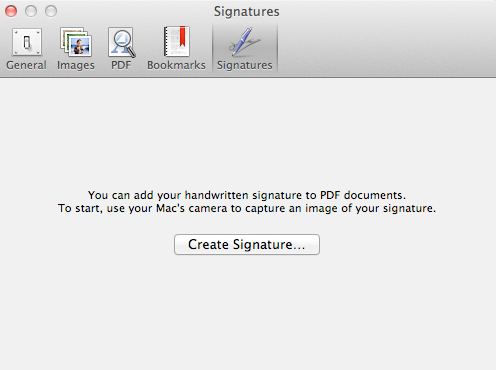
Simply click “Create Signature” and the following window will be presented:
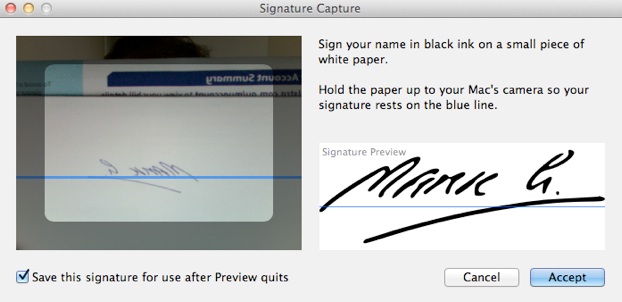
As you can see by the description you simply sign your signature with black ink on white paper and present it where the blue line is as shown above.
It does take a little moving around to get the signature to look good and the more ambient light you have in the room the better result you will get. It is also recommend to sign your name fairly large as that will also help the application identify all areas.
The tick box in the bottom left hand corner simply saves the signature in question to use at a later date once the Preview application has been quit. Please note you can remove a certain signature from the application at anytime you choose.
When ready simply click the “Accept” button and your signature will be saved as a useable signature. Should you have accessed this area through the annotation menu of a currently open document then the signature in question will automatically be imported into the document. An example of this can be shown below:
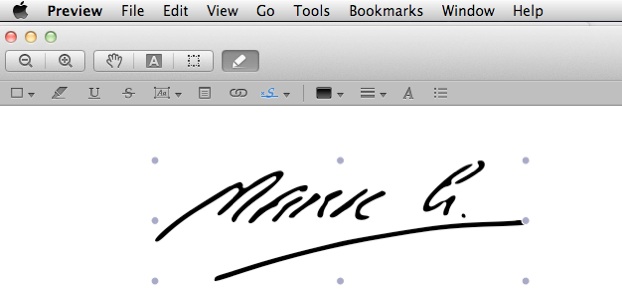
You will notice that you are able to increase or decrease the scale of the signature to suit the document you need to use it for. You also have complete freedom in where the signature can be placed.
Should you not immediately have a document to add your signature to then you will be taken back to the “Signatures” preferences area as shown below:
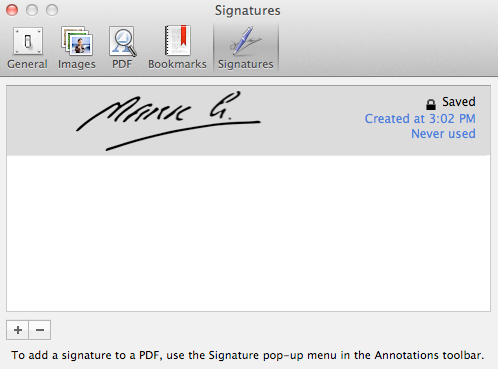
From here you can add additional signatures or remove anyone’s you currently have saved.
Removing a saved signature will present the following warning window:

Select okay to proceed or cancel should you wish to retain the signature as once it is removed you will not be able to reverse the process.
In future when you need to add the signature you have just saved simply click the annotation button followed by the signature button as shown below:
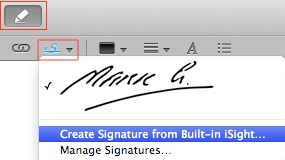
As you can see from the drop down menu above the signature I have added is ready to select and will then be immediately imported into your document.
For more helpful tips, check out our full collection of tutorials by visiting our How-To category!


