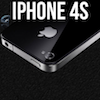
If you just got your hands on a shiny new iPhone 4S, you might be wondering how best to set it up. Apple provides two ways to do this – either using iCloud or using iTunes. Here’s what you need to know.

With iCloud and iOS 5 built in to the iPhone 4S, setting up your device no longer requires the use of a computer at all. I recommend setting your device up using iCloud, as it presents the fastest and easiest way to get started, but we’ll also look at setting your new device up through iTunes. Click on any of the below images (image credit: TiPb) to see a larger version.
Setting up your iPhone 4S
-
Setup via iCloud
The first time you turn on your new iPhone, you’ll see a screen that says “iPhone.” Sliding the bar at the bottom of the screen and setting your preferred language preference begins the setup process. Once you’ve selected your language, tap the “next” button. Now, select your region. The iPhone 4S provides a default country or region based on where your device was purchased, but more options are available if you tap “Show More.”

The iPhone 4S now gives you a choice of whether to enable or disable Location Services. These services can locate your device using Wi-Fi, local cell towers, or GPS to provide location-specific information. In order to use maps, geotag your photos, or use features such as Find my Friends or Find my iPhone, you must have location services enabled.
Next, the device prompts you to connect to a WiFi network. This is necessary in order to connect to your wireless carrier and Apple’s servers and activate your device. Apple Stores typically provide free WiFi which you can use to activate your device.
You are now presented with the choice to set your iPhone up as a new device, restore your iPhone from an iCloud backup, or restore your iPhone from an iTunes backup. If you have an iPhone 4, restoring your device will apply its settings to your new iPhone 4S.

If you choose to set up your iPhone 4S as a new device, just sign in with your Apple ID (or create one on your device). It’s important to note that the Apple ID you enter will be tied to iCloud, and if you use an Apple ID different than the one your iTunes Store purchases are linked to, you may have difficulty using many of iCloud’s features.

Next, agree to Apple’s Terms and Conditions. Once you agree, Apple will set your Apple ID up on your device and ask you if you’d like to use iCloud. iCloud is free and adds a number of additional features to your phone (as outlined here), but you can choose not to enable it if you wish.
If you enable iCloud, it will then ask you if you’d like to enable iCloud backups. This backs up your device to Apple’s servers so you can restore it any time you need without having to use a computer. Now you are asked to decide whether or not you want to enable Find my iPhone. It’s recommended that you do, as the service can help you find your device if it gets lost or stolen.

Lastly, your iPhone will now ask you whether you want to share diagnostic information with Apple, which may help them improve the iOS experience in the future. Once you’ve completed these steps, you’re done, and your device is ready to use!
-
Setup via iTunes
If you aren’t yet ready to make the plunge to iCloud, you can still set up your iPhone 4S using iTunes. Simply plug your iPhone into your Mac or PC and wait for iTunes to detect your device. Apple will ask you to register your device using your Apple ID.
If you’re upgrading from another device, iTunes will detect previous backups and allow you to restore your previous data, which will set your device up the way you had your previous device set up. If you don’t restore through iTunes, you can set your device up as a new device and proceed to set it up the way you like on your own.
Restoring your iPhone
-
Restore from iCloud Backup
If you need to restore from a previous device, you can now restore through iCloud. In order to do this, your previous device must have been running iOS 5 and set up to use iCloud backups. To restore from iCloud, first sign in with your Apple ID (the same one you’ve been using with prior backups). Apple will give you some terms and conditions to agree to, and once you do, you’ll see a list of recent backups to choose from.

Once you select the backup you want, iCloud will do the rest. Your iPhone will eventually restart, restoring all of your settings to the way you had them on your previous device, and iTunes will begin downloading all of the apps you had installed before. If you live in the U.S. or one of the other countries that has iTunes in the Cloud available, iTunes will also download all of the music, movies, TV shows and iBooks (purchased through iTunes) that you had on your previous device. WiFi may be required for large apps or files.
Instructions for restoring through iTunes are found above in the “Setup via iTunes” section.
That’s it! Your device is now set up and ready for use! Have fun!
For more helpful tips, check out our full collection of tutorials by visiting our How-To category!


