

This Mac tip is provided by Mark Greentree and was originally posted on Mark’s blog – Everyday Mac Support. For more of Mark’s tips visit his site, follow him on Twitter, or browse his archive of posts here.
How to: Browse Privately In Safari
Safari has an option to allow users to browse privately.
What this means is that information that would normally be retained in the history, search history, and AutoFill areas of the browser will not be recorded whilst you are traversing the online world.
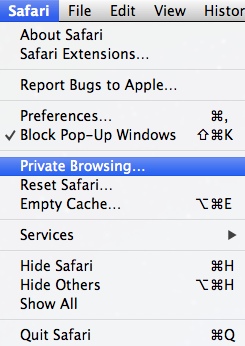
In order to activate private browsing simply navigate to the Safari > Private Browsing from the Menu Bar.
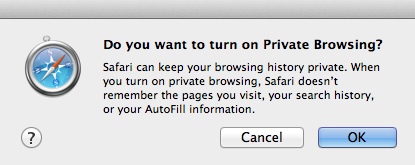
You will notice that after the words there are three full stops. This indicates that a popup menu will be presented that looks like this:
If you hold down the Option key on your keyboard when pressing Private Browsing you will notice the full stops will be removed. Upon clicking Private Browsing the popup message will not be shown, but your web browser will go straight into private mode.
You will know when you have Private Browsing activated because the word Private will appear in your Address Bar as shown below:
If you click on the private button in the address bar the following message will appear:
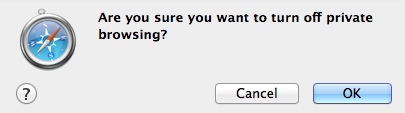
As you can see this allows you to turn off Private Browsing. Simply press OK if that is your intention.
You can turn off private browsing by returning to the original drop down Menu Bar command. You will notice that in the menu when Private Browsing is switched to on then a tick will be presented next to the option. Turning it off removes this tick.
