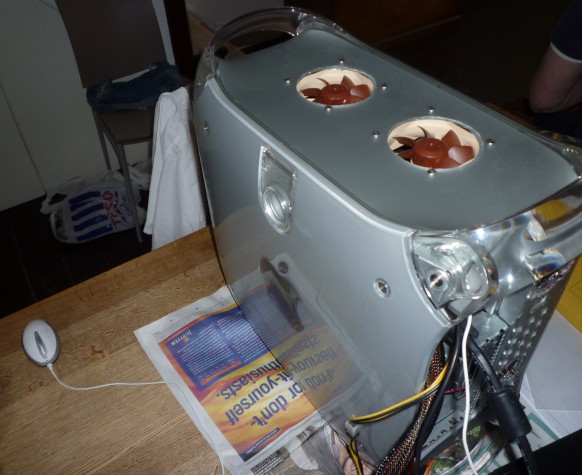
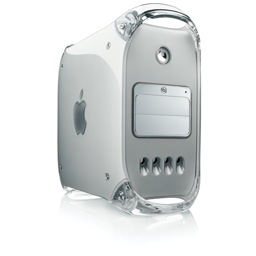
A while ago I had the insane idea to try and gut a Power Mac G4 and make it a beast for video editing, gaming, and graphic design. I was in need of a computer, and I could get a much faster machine than a Mac Pro for much less if I built it myself. That’s when I started researching parts, and discovered that all the cases designed for homebuilt systems were butt ugly – black boxes with no style. What I needed was something made by Apple. Hence the Powermac G4, which I chose over the G5 as I preferred the more fun design.
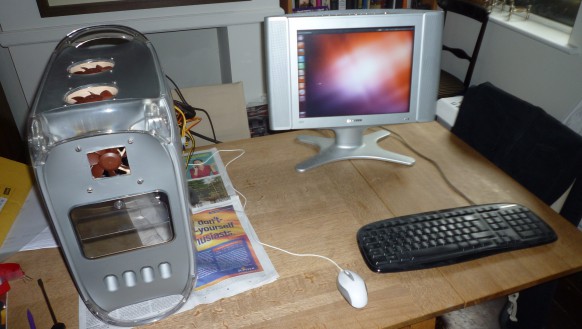
The Process
My mod was made even more difficult due to the model I chose: the MDD. It was the only PowerMac capable of handling two optical drives, and it was also in my opinion the coolest. Essentially, the difficulty was down to the location of the I/O ports and the PCI ports.
On previous models, they were the right way round to fit the standard motherboard configurations, however Apple’s custom made motherboard switched these around, so I had to cut out the entire back panel to get it to fit. Furthermore and of course, Apple’s motherboard is custom made, so you have to take everything out cut out all the mounting points, then create your own.
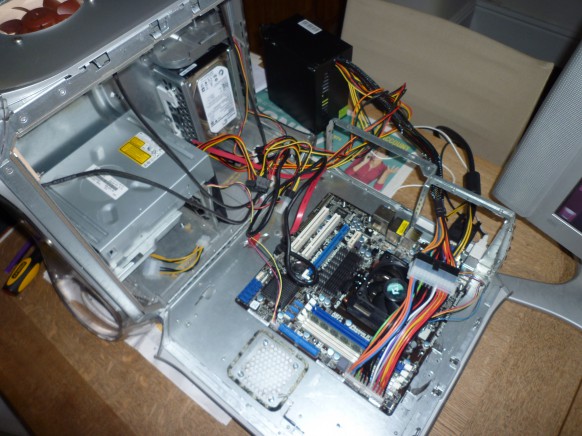
As far as which motherboards can fit in there, Micro ATX is the only viable (and simplest) option. While an ATX board can physically fit, you will need to attach it to the back of the case (not the door), so you really need to be insane to try and do it, even though some have successfully.
The next thing is ventilation. If you have loads of high end components in there, they will put out a lot of heat, and as such, you need fans. I probably went a bit over the top with six, but I think it’s worth it. I’ve got three 80mm fans (one at the front, two on the top), two 50mm fans (at the back) and one huge 120mm fan inside. I of course had to cut out the holes specifically, but it wasn’t too difficult.
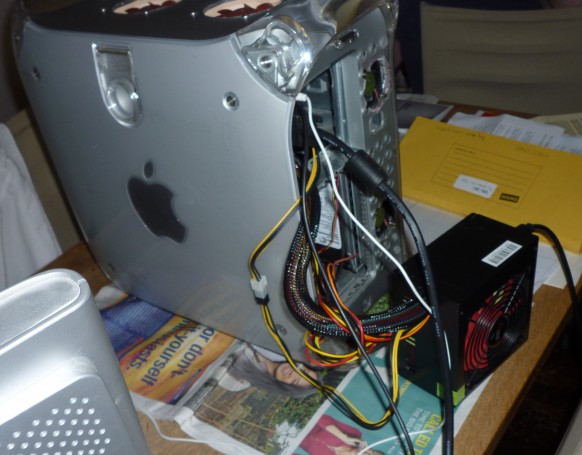
Other issues you will encounter if you mod an PowerMac G4 MDD include getting it to close (you have to cut out a section in the metal stand that holds the optical drive) and the power supply, which I have left outside the case. It doesn’t look pretty at the back, but it’s the best I can do for now as I can’t think of a better way to get it to work.
The final thing to think about is the graphics card. I bought a graphics card to use in this build, but it doesn’t fit with the case closed, so I’ll have to stick it in only when I want to play games and leave everything open, which is a slight problem but I can live with it.
Tools
This deserves it’s own section. It’s so important you have the right stuff, and the right stuff is a Dremel, a drill and a good set of screw driver. I did about three quarters of the work before I decided to buy a Dremel, and it made everything so much easier. So buy a Dremel before you begin!
The Specs
I wanted to create something more powerful than a mid-level Mac Pro when I did this, and that’s what I’ve done easily. The specs:
Processor: AMD FX-8150 (8 core, 3.6 Ghz [Turbo Boost to 4.2Ghz], 8MB L3 Cache)
Motherboard: ASRock 880GMH/U3S3
Graphics Card: XFX ATI Radeon HD 6950
Hard Drive: 3TB Seagate Barracuda
RAM: Kingston 8GB DDR3 (one stick)
I decided I didn’t want to run a Hackintosh system, as I would be tied down to buying certain components, and setting it up is complicated, especially when you have to update OS X. So this will be running Ubuntu, with Windows in a virtual machine just for gaming and using Autodesk software (which I’ve never used before, but I want to learn).
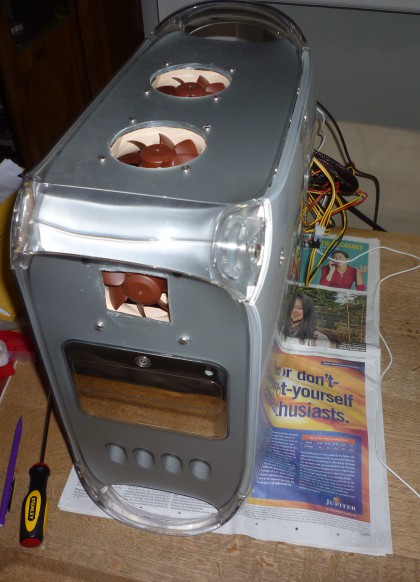
This is going to be a beast of a machine, and above all it’s completely customised to my needs and I can change anything I want easily and without any issues, something that buying a Mac Pro or running a Hackintosh would bring up.
Accessory wise, the Samsung display pictured was purely for testing purposes. I intend to buy a much better and bigger HD display to take full advantage of it, so it should be a pretty awesome experience.
If you’re interested, this build cost me around $1150, so much cheaper than a top of the range Mac Pro for similar performance.
